| 일 | 월 | 화 | 수 | 목 | 금 | 토 |
|---|---|---|---|---|---|---|
| 1 | 2 | 3 | 4 | 5 | ||
| 6 | 7 | 8 | 9 | 10 | 11 | 12 |
| 13 | 14 | 15 | 16 | 17 | 18 | 19 |
| 20 | 21 | 22 | 23 | 24 | 25 | 26 |
| 27 | 28 | 29 | 30 |
- solaris network
- dba
- sqlplus
- mariaDB
- 오라클
- RHEL4
- Network
- perl one-liner
- MySQL
- Unix
- Linux
- command & perl
- perl + 정규표현식
- SQL
- rac
- fdisk
- oracle
- PERL
- cygwin
- oracle install
- memory
- bash
- 연산자
- solaris
- Oracle RAC
- patch
- perl string
- php5
- grid
- prompt
- Today
- Total
DATA 전문가로 가는 길
[ Oracle ] Oracle Database Installation Guide 10g Release 2(10.2) for RHEL4(x86) 본문
[ Oracle ] Oracle Database Installation Guide 10g Release 2(10.2) for RHEL4(x86)
EstenPark 2010. 11. 24. 17:58작성자 : 박상수
작성일자 : 2010.11.26
문서업데이트 : 2010.12.14
작업환경 : VMware7 [ Redhat Enterprise 4 ]
목차
목 차
1. 오라클을 위한 자동 환경 설정(Auto configrue)
2. Oracle Database 10g R2 설치
3. Oracle Database 10g R2 Patchset 설치
4. Auto Database Create
5. Oracle Net 설치
6. Oracle Database 10g 접속 및 상태 확인
7. Oracle Patchset(10.2.0.5)
8. Oracle Patch(OPatch 사용법 - Interim)
9. Oracle Patch(OPatch 사용법 - CPU)
10. Oracle Database 이전 버전으로 원복(10.2.0.4)
1. 오라클 자동 환경 설정(RHEL4)
[설명] 아래 ora10g_autoconf.sh 파일을 다운받은 후 스크립트를 실행하면 오라클에 필요한 환경 설정을 자동으로 진행 합니다.
 ora10g_autoconf.sh
1. user 생성 : oracle , group 생성 : dba
2. rpm package 확인
3. /etc/sysctl.conf 커널 매개변수 추가
4. /etc/security/limits.conf 유저 쉘 Limit 설정내역 추가
5. /etc/pam.d/login 사용자 로그인시 리소스 할당내역 추가
6. /home/oracle/.bash_profile oracle 유저의 프로파일 추가
[2010-11-25 19:53:41]-[root@server102:/usr/local/src]
# /bin/csh ora10g_autoconf.sh
[설명] 복구 방법은 반대로 작업 하면 되며 추가된 내역을 모두 제거 하시면 됩니다.
[2010-11-26 01:49:25]-[root@server102:~/scripts]
# userdel -r oracle
[2010-11-26 01:51:01]-[root@server102:~/scripts]
# groupdel dba
[2010-11-26 01:51:19]-[root@server102:~/scripts]
# vi /etc/sysctl.conf
[2010-11-26 01:52:00]-[root@server102:~/scripts]
# vi /etc/security/limits.conf
[2010-11-26 01:52:27]-[root@server102:~/scripts]
# vi /etc/pam.d/login
2. Oracle Database 10g R2 설치
[설명] 압축 해제
[2010-11-26 16:34:42]-[oracle@server102:/usr/local/samba]
gzip -d 10201_database_linux32.zip
[설명] Database installer
[2010-11-26 16:34:42]-[oracle@server102:/usr/local/samba]
cd database
[2010-11-26 16:38:36]-[oracle@server102:/usr/local/samba/database]
$ ls
doc install response runInstaller stage welcome.html
[2010-11-26 16:38:37]-[oracle@server102:/usr/local/samba/database]
$ ./runInstaller
[설명] 설치 방식을 선택 하시면 되는데 고급설치를 체크하시기 바랍니다.

[설명] 오라클 인스톨러가 설치될 장소는 /home/oracle/oraInventory였고, 운영체제 그룹은 dba를 선택 합니다.

[설명] 오라클 유형을 선택하면 되는데 엔터프라이즈는 전체 옴션을 모두 설치 하는 방법을 말합니다.

[설명] 홈 세부 정보를 지정하시면 되는데 아래와 같이 자동으로 나오는 이유는 .bash_profile에서 설정한 내역을 기준으로 세팅되게 되어있습니다. 다른 곳으로 변경을 원한다면 이름과 경로를 변경해주시기 바랍니다.

[설명] 아래 항목과 같이 조건을 검사하는데 간혹 상태에서 설치할 수 없다고 나오면 체크해서 설정 해주시기 바랍니다.

[설명] 이부분에서 데이터베이스를 생성 해도 되지만 나중에 dbca를 통해서 설치하는 방법을 할 예정으로 우선 소프트웨어만 설치 하도록 하겠습니다.

[설명] 참 쉽죠. 여기까지 성공하셨다면 오라클 소프트웨어를 80%이상 설치 하신 거나 마찬 가지 입니다.

[설명] 이부분은 oracle 유저로 스크립트를 실행 하시면 안됩니다. 반드시 root 게정으로 접속하여 실행 하시기 바랍니다.

[2010-11-26 17:06:49]-[oracle@server102:~]
$ su -
Password:
[2010-11-26 17:07:23]-[root@server102:~]
# whoami
root
[2010-11-26 17:09:24]-[root@server102:~]
# /home/oracle/product/10g/root.sh
Running Oracle10 root.sh script...
The following environment variables are set as:
ORACLE_OWNER= oracle
ORACLE_HOME= /home/oracle/product/10g
Enter the full pathname of the local bin directory: [/usr/local/bin]:
Copying dbhome to /usr/local/bin ...
Copying oraenv to /usr/local/bin ...
Copying coraenv to /usr/local/bin ...
Creating /etc/oratab file...
Entries will be added to the /etc/oratab file as needed by
Database Configuration Assistant when a database is created
Finished running generic part of root.sh script.
Now product-specific root actions will be performed.
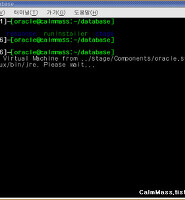
[설명] 설치가 완료 되면 아래와 같은 그림이 나옵니다.

3. Oracle Database 10g R2 Patchset 설치
[설명] 압축 해제 및 설치
[2010-11-26 17:57:25]-[oracle@server102:/usr/local/samba]
$ unzip p6810189_10204_Linux-x86.zip
[2010-11-26 20:05:48]-[oracle@server102:~/sources]
$ cd Disk1/
[2010-11-26 20:06:47]-[oracle@server102:~/sources/Disk1]
$ ./runInstaller


[설명] 스크립트 실행

[2010-11-26 20:26:12]-[oracle@server102:~]
$ su -
Password:
[2010-11-26 20:26:19]-[root@server102:~]
# /home/oracle/product/10g/root.sh
Running Oracle10 root.sh script...
The following environment variables are set as:
ORACLE_OWNER= oracle
ORACLE_HOME= /home/oracle/product/10g
Enter the full pathname of the local bin directory: [/usr/local/bin]:
The file "coraenv" already exists in /usr/local/bin. Overwrite it? (y/n)
[n]: y
Entries will be added to the /etc/oratab file as needed by
Database Configuration Assistant when a database is created
Finished running generic part of root.sh script.
Now product-specific root actions will be performed.
[설명] 정상적으로 패치를 완료 하였습니다.

4. Auto Database Create
[설명] 데이터베이스를 생성하기 위해서 아래와 같은 명령어를 사용 하겠습니다.
[2010-11-26 20:28:43]-[oracle@server102:~/sources/Disk1]
$ dbca

[설명] 데이터베이스 생성 체크 후 다음을 누르세요.

[설명] 모우 사용할 수 있게 범용으로 체크하고 다음을 누르세요.

[설명] 데이터베이스를 사용하기위해서 testdb이름을 지정하고 SID를 생성해야 합니다. 다음을 누르세요.

[설명] 다음을 누르세요.

[설명] 패스워드를 입력 후 다음을 누르세요.

[설명] 파일 시스템으로 설정하여 데이터베이의 저장영역을 사용 합니다. 다음을 누르세요.

[설명] 다음을 누르세요.

[설명] 플래시 복구를 위해서 영역을 지정 하도록 하겠습니다. 다음을 누르세요.

[설명] 샘플 스키마를 체크하고 다음을 누르세요.

[설명] 언어를 선택 하세요. K016KSC5601 선택 후 다음을 누르세요.

[설명] 다음을 누르세요.

[설명] 데이터베이스 생성을 체크 후 완료를 누르세요.

[설명] 완료를 누르세요.

[설명] 데이터베이스 생성 및 인스턴스를 생성 합니다. 100%가 되면 경고창이 나오는데 그건 무시하고 확인 누르세요.

[설명] 암호관리를 선택 합니다.

[설명] SCOTT, HR 사용자의 암호를 입력 하고 확인을 누르세요. 계정을 잠그겠냐고 되어있는 부분은 체크를 해제 해주시기 바랍니다. 아래 그림에서는 체크 되어있으나 실제로는 체크를 해제 해야 합니다. 만약 해제 못했을 경우에는 SQL에서 변경 가능 합니다

5. Oracle Net 설치
[설명] 오라클 넷 설치 시작
[2010-11-26 21:32:51]-[oracle@server102:~]
$ netca
[설명] 리스너 구성 선택 후 다음을 누르세요.

[설명] 리스터를 처움 구성하게 되면 "추가" 항목만 나오게 됩니다. 다음을 누르세요.

[설명] LISTENER가 아닌 다른 이름을 부여하고 싶으면 적고 다음을 누르세요.

[설명] 기본적으로 세팅되어있는 TCP를 선택 한 후 다음을 누르세요.

[설명] 리스터 포트를 선택 하는 화면 입니다. 다른 포트를 사용하려면 다른 포트 번호 사용에서 번호를 적으면 됩니다. 필자는 기본 포트를 사용하겠습니다. 다음을 누르세요.

[설명] 이미 구성이 완료 된 상태이기 때문에 리스너를 재구성 하지 않겠습니다. 다음을 누르세요.

[설명] 성공하셨습니다. 리스너가 구성이 완료 되면 netca를 띄운 터미널창에 메시지가 나올 것입니다. 다음을 누르세요.

[설명] 로컬 네트워크 서비스를 사용하기 위해서 항목을 선택 후 다음을 누르세요.

[설명] 추가 항목 선택 후 다음을 누르세요.

[설명] 서비스 이름은 기존에 SID와 동일하게 구성하겠습니다.

[설명] 통신프로토콜은 TCP를 선택 해주시기 바랍니다. 다음을 누르세요.

[설명] 로컬호스트 이름을 적어 주시기 바랍니다. hostname 명령어를 이용해서 나오는 값을 넣어주셔도 됩니다. 다음을 누르세요.

[설명] 로컬 네트워크 서비스가 정상적으로 설정 되었는지 테스트를 해보겠습니다. 다음을 누르세요.

[설명] system은 그대로 두고 암호 부분에서 데이터베이스 생성시 만들었던 패스워드를 입력 해주세요.

[설명] 아래와 같은 메시지가 나오면 정상적으로 설정 완료 하였습니다. 다음을 누르세요.

[설명] 역시 기본적으로 사용할 네트워크 서비스 이름을 적어주시기 바랍니다.

[설명] 다음을 누르세요.

[설명] 구성을 모두 완료 하였습니다.

[설명] 완료를 누르세요.

[설명] 위의 섹션을 수행 할때마다 아래와 같은 메시지를 출력하게 됩니다. 주항색으로 체크된 항목이 반드시 있어야 합니다. 꼭 확인 후 다음 작업을 진행 하시기 바랍니다.

[설명] 리스너 상태를 확인 해보도록 하겠습니다.
[2010-11-26 03:42:38]-[oracle@estenpark:~/sources/Disk1]
$ lsnrctl status
LSNRCTL for Linux: Version 10.2.0.4.0 - Production on 26-NOV-2010 03:46:29
Copyright (c) 1991, 2007, Oracle. All rights reserved.
Connecting to (DESCRIPTION=(ADDRESS=(PROTOCOL=TCP)(HOST=estenpark.com)(PORT=1521)))
STATUS of the LISTENER
------------------------
Alias LISTENER
Version TNSLSNR for Linux: Version 10.2.0.4.0 - Production
Start Date 26-NOV-2010 03:31:36
Uptime 0 days 0 hr. 14 min. 53 sec
Trace Level off
Security ON: Local OS Authentication
SNMP OFF
Listener Parameter File /home/oracle/product/10g/network/admin/listener.ora
Listener Log File /home/oracle/product/10g/network/log/listener.log
Listening Endpoints Summary...
(DESCRIPTION=(ADDRESS=(PROTOCOL=tcp)(HOST=estenpark.com)(PORT=1521)))
(DESCRIPTION=(ADDRESS=(PROTOCOL=ipc)(KEY=EXTPROC0)))
Services Summary...
Service "PLSExtProc" has 1 instance(s).
Instance "PLSExtProc", status UNKNOWN, has 1 handler(s) for this service...
Service "testdb" has 1 instance(s).
Instance "testdb", status READY, has 1 handler(s) for this service...
Service "testdbXDB" has 1 instance(s).
Instance "testdb", status READY, has 1 handler(s) for this service...
Service "testdb_XPT" has 1 instance(s).
Instance "testdb", status READY, has 1 handler(s) for this service...
The command completed successfully
6. Oracle Database 10g 접속 및 상태 확인
[2010-11-26 03:48:43]-[oracle@estenpark:~/sources/Disk1]
$ sqlplus / as sysdba
SQL*Plus: Release 10.2.0.4.0 - Production on Fri Nov 26 03:48:51 2010
Copyright (c) 1982, 2007, Oracle. All Rights Reserved.
Connected to:
Oracle Database 10g Enterprise Edition Release 10.2.0.4.0 - Production
With the Partitioning, OLAP, Data Mining and Real Application Testing options
SQL> startup
ORA-01081: cannot start already-running ORACLE - shut it down first
SQL> select status from v$instance;
STATUS
------------
OPEN
7. Oracle Patchset(10.2.0.5)
작업 순서는 아래와 같이 하도록 하겠습니다.
1. Oracle Database 10g R2 Patchset Download
2. 모든 Process Stop, Oracle Database Stop
3. 용량 부족으로 하드 추가 후 $ORACLE_BASE 경로에 있는 파일 모두 백업 합니다.
4. 환경 변수 재확인
5. Oracle Database 10g R2 Patchset 적용
6. Oracle Database Upgread 모드로 시작 및 Temporary tablespace 추가
7. POST 방식으로 작업 진행 및 데이터베이스 정상 가동 확인
8. changePerm.sh 스크립트 수행 및 Process Start
[작업 1] 웹에서 다운 받고 로컬 컴퓨터에서 SFTP를 이용하여 복사를 했습니다.
[2010-12-14 01:03:33]-[oracle@estenpark:~/patchset]
$ ls -l
합계 1079188
drwxr-xr-x 2 oracle dba 4096 12월 14 00:32 10g patch
drwxr-xr-x 2 oracle dba 4096 12월 14 00:32 cpu patch
-rw-r--r-- 1 oracle dba 1103992900 12월 14 00:35 p8202632_10205_LINUX.zip
[작업 2] 모든 프로세스 종료 및 오라클 데이터베이스 종료(shutdown normal)
[설명] 오라클 오픈 단계 확인
SQL> select status from v$instance;
STATUS
------------
OPEN
[설명] 현재 사용하고 있는 파라미터 파일이 무엇인지 확인합니다. VALUE에 값이 없다는 의미는 pfile를 사용하고 있다는 것으로 간주하시면 됩니다. 만약 spfile로 설정 되어있다면 "create pfile from spfile"를 수행하여 pfile를 생성 해두시길 바랍니다.
SQL> show parameter pfile;
NAME TYPE VALUE
------------------------------------ ----------- ------------------------------
spfile string
[설명] 데이터베이스에 접속한 유자가 존재하면 해당 유저가 접속을 종료할때까지 대기 했다가 데이터베이스를 종료 합니다. 반드시 nomal로 종료 하시기 바랍니다.(일반 테스트 시에는 shutdown immediate로해도 됩니다.)
SQL> shutdown normal
Database closed.
Database dismounted.
ORACLE instance shut down.
[작업 3] 디스크 추가(용량 없을 시) 리눅스디스크추가방법을 참조하세요.
[2010-12-14 01:19:57]-[root@estenpark:/]
# df -h |grep orabackup
/dev/sdb 5.0G 43M 4.7G 1% /orabackup
[설명] 중요 파일만 압축합니다.
[2010-12-14 01:31:16]-[oracle@estenpark:~]
$ tar cf ora_backup_201012120126.tar admin disks flash_recovery_area oraInventory oradata product
[설명] 압축된 파일을 /orabackup 증설한 디스크에 백업 합니다. 반드시 용량 체크를 하시기 바랍니다.
[2010-12-14 01:36:36]-[oracle@estenpark:~]
$ mv ora_backup_201012120126.tar /orabackup/
[설명] 오라클 10G에서 Enterprise Manager 데몬 종료 합니다.
[2010-12-14 01:39:40]-[oracle@estenpark:~]
$ emctl stop dbconsole
TZ set to ROK
Oracle Enterprise Manager 10g Database Control Release 10.2.0.4.0
Copyright (c) 1996, 2007 Oracle Corporation. All rights reserved.
http://estenpark.com:1158/em/console/aboutApplication
Stopping Oracle Enterprise Manager 10g Database Control ...
... Stopped.
[설명] iSQLPlus를 정지합니다. 웹브라우저에서 사용하는 툴이므로 없는 경우가 많습니다.
[2010-12-14 01:39:57]-[oracle@estenpark:~]
$ isqlplusctl stop
iSQL*Plus 10.2.0.4.0
Copyright (c) 2003, 2007, Oracle. All Rights Reserved.
iSQL*Plus instance on port 5560 is not running ...
[설명] 반드시 리스너 데몬은 종료 하셔야 합니다. 그래야 일반적인 트랜젝션을 차단 할 수 있습니다.
[2010-12-14 01:40:13]-[oracle@estenpark:~]
$ lsnrctl stop
LSNRCTL for Linux: Version 10.2.0.4.0 - Production on 14-DEC-2010 01:40:22
Copyright (c) 1991, 2007, Oracle. All rights reserved.
Connecting to (DESCRIPTION=(ADDRESS=(PROTOCOL=TCP)(HOST=estenpark.com)(PORT=1521)))
TNS-12541: TNS:no listener
TNS-12560: TNS:protocol adapter error
TNS-00511: No listener
Linux Error: 111: Connection refused
Connecting to (DESCRIPTION=(ADDRESS=(PROTOCOL=IPC)(KEY=EXTPROC0)))
TNS-12541: TNS:no listener
TNS-12560: TNS:protocol adapter error
TNS-00511: No listener
Linux Error: 111: Connection refused
[작업 4] 환경 변수 재확인 (ORACLE_HOME, ORACLE_SID)
[2010-12-14 01:47:31]-[oracle@estenpark:~]
$ env
[작업 5] Oracle Database 10g R2 Patchset 적용하기 위해서 Xmanager 버전 3을 이용해서 xstart 툴을 이용하도록 하겠습니다.
[설명] ZIP으로 압축된 파일을 unzip 명령어를 이용하여 압축을 해제 합니다.
[2010-12-14 01:51:44]-[oracle@estenpark:~/patchset]
$ unzip p8202632_10205_LINUX.zip
[설명] Xmanager 3.0 툴을 이용하여 OUI환경을 띄웁니다.

[설명] ./runInstaller 시작

[설명] 다음을 눌러주세요.

[설명] 경로를 확인 후 다음을 눌러주세요.

[설명] 체크를 해제 후 다음을 눌러주세요.

[설명] 경고창이 나오게 되는데 무시하고 예를 눌러주세요.

[설명] 검사에서 모두 성공하였는지 확인 후 다음을 눌러주세요.

[설명] 설치를 눌렀다면 아래처럼 각 항목별로 설치를 시작합니다.

[설명] root 계정으로 접속하여 아래 스크립트르 수행합니다.

[설명] 아래와 같이 수행하시기 바랍니다.

[설명] Oracld Database 10g 10.2.0.5 Patchset 설치 완료

[작업 6] Oracle Database Upgread 모드로 시작 및 Temporary tablespace 추가
[설명] sqlplus를 이용하여 접속 합니다.(로컬)
[2010-12-14 02:27:08]-[oracle@estenpark:~/patchset]
$ sqlplus / as sysdba
SQL*Plus: Release 10.2.0.5.0 - Production on Tue Dec 14 02:27:13 2010
Copyright (c) 1982, 2010, Oracle. All Rights Reserved.
Connected to an idle instance.
[설명] 보통의 경우 startup을 이용하여 단계별로 수행하여 OPEN으로 정상 가동 되지만 데이터베이스를 생성했거나 사용하고 있는 상태라면 OPEN 단계에서 에러가 발생 됩니다.
UPGREADE 모드 : 시스템 초기 변구값이 upgrade 스크립트로 지정된 경우 OPEN UPGRADE에서 데이터베이스를 시작하며, UPGRADE는 새버전으로 시작할때 한번만 실행 됩니다. 결국 다른 유저는 접근 할 수 없으며 데이터베이스에 기록 할 수 없습니다.(1차적으로 방어하기 위해서 리스너, iSQLplus 등등을 막는 방법도 있습니다.)
SQL> startup upgrade
ORACLE instance started.
Total System Global Area 285212672 bytes
Fixed Size 1273276 bytes
Variable Size 92275268 bytes
Database Buffers 188743680 bytes
Redo Buffers 2920448 bytes
Database mounted.
Database opened.
[설명] 현재 상태를 확인 해본 결과 "OPEN MIGRATE"로 정의 되어있습니다.
SQL> select status from v$instance;
STATUS
------------
OPEN MIGRATE
[설명] SYSTEM Tablespace에 여유공간이 50MB 이상 남아있어야 하며, DEFAULT로 사용하는 TEMPORARY Tablespace에 여유공간이 48MB 이상 남아 있어야 합니다. 그중에서 TEMPORARY Tablespace 사이즈를 확인 하고 용량이 적을 경우 재생성 하여 DEFAULT 값을 변경하도록 하겠습니다.
SQL> @ttbscheck
col tablespace_name for a10
col file_name for a50
select tablespace_name, bytes/1024/1024 MB, file_name
from dba_temp_files
/
TABLESPACE MB FILE_NAME
---------- ---------- --------------------------------------------------
TEMP 20 /home/oracle/oradata/testdb/temp01.dbf
[설명] temp02라는 이름의 temporary tablespace가 생성 되었고 파일 명은 temp02.dbf로 새로 추가되었습니다
SQL> create temporary tablespace temp02
2 tempfile '/home/oracle/oradata/testdb/temp02.dbf' size 100M;
Tablespace created.
[설명] temp02 파일이 생성되었는지 확인 합니다.
SQL> @ttbscheck
TABLESPACE MB FILE_NAME
---------- ---------- --------------------------------------------------
TEMP 20 /home/oracle/oradata/testdb/temp01.dbf
TEMP02 100 /home/oracle/oradata/testdb/temp02.dbf
[설명] 현재 사용하고 있는 기본 TEMPORARY Tablespace는 TEMP로 확인 됩니다.
SQL> @ttbsstatus
col property_name for a30
col property_value for a10
col description for a50
select * from database_properties
where property_name like 'DEFAULT%'
/
PROPERTY_NAME PROPERTY_V DESCRIPTION
------------------------------ ---------- --------------------------------------------------
DEFAULT_TEMP_TABLESPACE TEMP Name of default temporary tablespace
DEFAULT_PERMANENT_TABLESPACE USERS Name of default permanent tablespace
DEFAULT_TBS_TYPE SMALLFILE Default tablespace type
[설명] 위에서 생성했던 TEMP02로 TEMPORARY Tablespace를 변경 하도록 하겠습니다.
SQL> alter database default temporary tablespace temp02;
Database altered.
[설명] 아래와 같이 TEMP02로 설정 되어있다면 정상적으로 변경 완료 하였습니다.
SQL> @ttbsstatus
PROPERTY_NAME PROPERTY_V DESCRIPTION
------------------------------ ---------- --------------------------------------------------
DEFAULT_TEMP_TABLESPACE TEMP02 Name of default temporary tablespace
DEFAULT_PERMANENT_TABLESPACE USERS Name of default permanent tablespace
DEFAULT_TBS_TYPE SMALLFILE Default tablespace type
[작업 7] POST 방식으로 작업 진행하기
[설명] spool file을 생성 합니다.
SQL> spool patch.log
[설명] 스크립트를 수행하기 위해서 @사용하였고 ?($ORACLE_HOME)를 이용하여 "catupgrd.sql"을 사용합니다.
만약 초기 DB 생성하였다면 아래와 같은 스크립트를 수행하지 않아도 되지만 현재 patchset는 10.0.0.4버전에서 10.0.0.5 버전으로 업그레이드 하였으므로 데이터베이스의 버전과 상태를 각각 패치하는 방법입니다.
SQL> @?/rdbms/admin/catupgrd.sql
.. 대략 20~30분 소요됩니다..
[설명] 정상적으로 수행 하였다면 아래와 같은 메시지가 나오게 됩니다.
Total Upgrade Time: 00:28:33
DOC>#######################################################################
DOC>#######################################################################
DOC>
DOC> The above PL/SQL lists the SERVER components in the upgraded
DOC> database, along with their current version and status.
DOC>
DOC> Please review the status and version columns and look for
DOC> any errors in the spool log file. If there are errors in the spool
DOC> file, or any components are not VALID or not the current version,
DOC> consult the Oracle Database Upgrade Guide for troubleshooting
DOC> recommendations.
DOC>
DOC> Next shutdown immediate, restart for normal operation, and then
DOC> run utlrp.sql to recompile any invalid application objects.
DOC>
DOC>#######################################################################
[설명] spool file을 종료합니다.(나중에 어떤 작업을 했는지 확인하기 위함..)
SQL> spool off
[설명] 이번에도 normal 모드로 종료합니다.
SQL> shutdown normal
Database closed.
Database dismounted.
ORACLE instance shut down.
[설명] 가장 떨리는 순간입니다. 이부분에서 잘못되면 압축했던 파일로 복구 작업을 진행하셔야 합니다.
SQL> startup
ORACLE instance started.
Total System Global Area 285212672 bytes
Fixed Size 1273276 bytes
Variable Size 92275268 bytes
Database Buffers 188743680 bytes
Redo Buffers 2920448 bytes
Database mounted.
Database opened.
[설명] 정상적으로 "OPEN"단계로 올라왔습니다. 결론으로 말씀 드리면 온라인 데이터베이스 파일과, 온라인 리두로그버퍼파일이 정상적으로 오픈 했다는 의미와 같습니다.
SQL> select status from v$instance;
STATUS
------------
OPEN
[설명] 마지막입니다. 아래 utlrp.sql은 Object recompile하는 방법입니다. 보통 포럼에서는 INVALID OBJECT 컴파일이라고 합니다. 여기에서 각 체크별 에러 개수가 "0"으로 나와야 정상적으로 적용한 겁니다.
SQL> @?/rdbms/admin/utlrp.sql
.. 생략..
ERRORS DURING RECOMPILATION
---------------------------
0
[작업 8] changePerm.sh 스크립트 수행 및 Process Start
[설명] changePerm.sh 스크립트는 기본적으로 patchset을 수행하고 나면 Oracle Databace가 설치된 $ORACLE_HOME/bin 실행 파일에 대해서 퍼미션, 소유권 등등 작업을 진행 합니다.
매크로만 확인 해보면 어떤 명령어를 수행하는지 짐작은 할 수 있습니다.
[2010-12-14 04:03:12]-[oracle@estenpark:~/patchset]
$ cd $ORACLE_HOME/install
[2010-12-14 04:03:21]-[oracle@estenpark:~/product/10g/install]
$ ./changePerm.sh
Do you wish to continue (y/n) [n]: y
..
Finished running the script successfully
[설명] Enterprise Manager 시작
[2010-12-14 04:09:11]-[oracle@estenpark:~/product/10g/install]
$ emctl start dbconsole
[설명] iSQLPlus 시작
[2010-12-14 04:09:11]-[oracle@estenpark:~/product/10g/install]
$ isqlplusctl start
[설명] 리스너 시작
[2010-12-14 04:09:11]-[oracle@estenpark:~/product/10g/install]
$ lsnrctl start
8. Oracle Patch(OPatch 사용법 - Interim)
[설명] Perl 버전 확인
[2010-12-14 04:51:18]-[root@estenpark:/home/oracle/patchset/cpu_patch/9119226]
# perl -vsrsion
This is perl, v5.8.5 built for i386-linux-thread-multi
[설명] Oracle Database 10g 버전은 기본적으로 $ORACLE_HOME/OPatch 디렉토리에 실행 파일이 있습니다.
그래서 명령어를 수행할 수 있게 PATH를 지정해주셔야 합니다.
[2010-12-14 04:16:08]-[oracle@estenpark:~/product/10g]
$ which opatch // 기본설정이라면 없는게 정상입니다.
[2010-12-14 04:16:28]-[oracle@estenpark:~]
$ vi .bash_profile
export PATH=$PATH:$ORACLE_HOME/bin:$ORACLE_HOME/OPatch
[2010-12-14 04:17:35]-[oracle@estenpark:~]
$ source .bash_profile
[설명] 해당 명령어가 어디에 있는지 확인하기 위해서는 which 명령어를 이용하면 됩니다.
[2010-12-14 04:17:41]-[oracle@estenpark:~]
$ which opatch
~/product/10g/OPatch/opatch
[설명] inventory는 오라클 제품에 두개의 인벤토리를 유지하게 됩니다.
센트럴 인벤토리 : $ORACLE_BASE/oraInventory
로컬 인벤토리 : $ORACLE_HOME/inventory
[2010-12-14 05:11:52]-[oracle@estenpark:~/product/10g]
$ cat oraInst.loc
inventory_loc=/home/oracle/oraInventory
inst_group=dba
[설명] 일반적으로 어떠한 패치가 적용되어있는지 확인 해보도록 하겠습니다. 현재는 패치셋은 3번 업데이트 되었습니다. 하지만 Interim 패치는 한번도 수행되지 않아서 패치 내역이 없습니다.
[2010-12-14 04:19:52]-[oracle@estenpark:~]
$ opatch lsinventory
.. 생략 ..
--------------------------------------------------------------------------------
설치된 최상위 레벨 제품(3):
Oracle Database 10g 10.2.0.1.0
Oracle Database 10g Release 2 Patch Set 3 10.2.0.4.0
Oracle Database 10g Release 2 Patch Set 4 10.2.0.5.0a
이 Oracle 홈에 3개의 제품이 설치되어 있습니다.
이 Oracle 홈에 설치된 Interim 패치가 없습니다.
[설명] 그럼 다운받은 패치를 압축을 해제하고 디렉토리로 이동합니다.
[2010-12-14 04:14:30]-[oracle@estenpark:~/patchset/10g_patch]
$ unzip p8715617_10205_Generic.zip
[2010-12-14 04:14:30]-[oracle@estenpark:~/patchset/10g_patch]
$ cd 8513146/
[설명] 패치를 적용하기 위해서는 opatch apply 옵션을 이용하면 됩니다.
[2010-12-14 04:24:10]-[oracle@estenpark:~/patchset/10g_patch/8715617]
$ opatch apply
[설명] opatch lsinventory 옵션을 이용하여 적용되었는지 확인 해보면 아래 "Patch 8715617" 적용된 것을 볼 수 있습니다.
[2010-12-14 04:24:30]-[oracle@estenpark:~/patchset/10g_patch/8715617]
$ opatch lsinventory
.. 생략 ..
Interim 패치(1):
Patch 8715617 : applied on Tue Dec 14 04:24:30 KST 2010
Unique Patch ID: 12986534
Created on 2 Oct 2010, 12:46:18 hrs PST8PDT
Bugs fixed:
8715617
[설명] opatch apply를 적용하면 아래와 같이 $ORACLE_HOME/.patch_storage 디렉토리에 임시 패치를 적용하게 됩니다. 해당 패치 번호를 이름으로 디렉토리가 생성되고, 해당 디렉토리 밑에 적용 로그와 패치 적용 이전의 라이브러리 파일, 롤백시 적용할 스크립트가 있습니다.(이방법은 트러블슈팅할때 많이 사용하는 방법입니다.)
[2010-12-14 05:18:03]-[oracle@estenpark:~/product/10g/.patch_storage]
$ ls 8715617*
8715617_Oct_2_2010_12_46_18
[설명] opatch rollback 옵션을 이용하여 패치된 ID를 이용하여 제거하는 방법입니다.
[2010-12-14 04:26:12]-[oracle@estenpark:~/patchset/10g_patch/8715617]
$ opatch rollback -id 8715617
9. Oracle Patch(OPatch 사용법 - CPU)
[설명] 압축을 해제하고 디렉토리로 이동합니다.
[2010-12-14 06:21:54]-[oracle@estenpark:~/cpupatch]
$ unzip p9119226_10204_Linux-x86.zip
[2010-12-14 06:22:44]-[oracle@estenpark:~/cpupatch/9119226/7155248]
$ cd ~/cpupatch/9119226/7155248
[설명] 패치를 적용합니다.
[2010-12-14 06:24:55]-[oracle@estenpark:~/cpupatch/9119226/7155248]
$ opatch apply
Invoking OPatch 10.2.0.4.2
Oracle Interim Patch Installer version 10.2.0.4.2
Copyright (c) 2007, Oracle Corporation. All rights reserved.
Oracle 홈: /home/oracle/product/10g
중앙 인벤토리: /home/oracle/oraInventory
출처: /etc/oraInst.loc
OPatch 버전: 10.2.0.4.2
OUI 버전: 10.2.0.4.0
OUI 위치 : /home/oracle/product/10g/oui
로그 파일 위치: /home/oracle/product/10g/cfgtoollogs/opatch/opatch2010-12-14_06-25-16오전.log
ApplySession이(가) '/home/oracle/product/10g' OH에 Interim 패치 '7155248'을(를) 적용하는 중입니다.
Running prerequisite checks...
OPatch가 인벤토리에서 비클러스터 Oracle 홈을 감지했으므로 로컬 시스템만 패치합니다.
Please shutdown Oracle instances running out of this ORACLE_HOME on the local system.
(Oracle Home = '/home/oracle/product/10g')
Is the local system ready for patching? [y|n]
y
User Responded with: Y
Oracle 홈에 대한 파일 및 인벤토리(자동 롤백에 대한 사항이 아님)를 백업하는 중
복원에 대해 '7155248' 패치의 영향을 받는 파일을 백업하는 중입니다. 이 작업은 약간의 시간이 걸릴 수 있습니다.
롤백에 대해 '7155248' 패치의 영향을 받는 파일을 백업하는 중입니다. 이 작업은 약간의 시간이 걸릴 수 있습니다.
oracle.rdbms, 10.2.0.4.0 구성 요소를 패치하는 중...
파일을 "/home/oracle/product/10g/rdbms/lib/env_rdbms.mk"(으)로 복사하는 중
iextjob 대상에 대해 make를 실행하는 중
iextjobo 대상에 대해 make를 실행하는 중
ApplySession이(가) 인벤토리에 Interim 패치 '7155248'을(를) 추가하는 중입니다.
Verifying the update...
Inventory check OK: Patch ID 7155248 is registered in Oracle Home inventory with proper meta-data.
Files check OK: Files from Patch ID 7155248 are present in Oracle Home.
로컬 시스템이 패치되어 재시작할 수 있습니다.
OPatch succeeded.
[2010-12-14 06:29:10]-[oracle@estenpark:~/cpupatch/9119226/7155248]
$ opatch lsinventory
.. 생략 ..
Interim 패치(1):
Patch 7155248 : applied on Tue Dec 14 06:25:25 KST 2010
Created on 20 Jun 2008, 07:18:50 hrs PST8PDT
Bugs fixed:
7155248
[설명] 임시 적용패치 파일을 확인하기위해서 $ORACLE_HOME/.patch_storage/[patch_id]를 확인 합니다.
[2010-12-14 06:30:44]-[oracle@estenpark:~/product/10g]
$ cd $ORACLE_HOME
[2010-12-14 06:31:06]-[oracle@estenpark:~/product/10g/.patch_storage]
$ ls 7155248*
backup files make.txt original_patch rac restore.sh rollback.sh
10. Oracle Database 이전 버전으로 원복(10.2.0.4)
중요한 내용은 여기에 controlfile, redologfile, tablespace file, password file 등등 oradata에 있다고 가정하고 압축했기 때문에 가능 한 것입니다. 만약 각 파일의 위치가 다른 곳에 지정하셨다면 모두 같은 위치에 원복하셔야 합니다.
항목 7번에서 이미 백업데이터를 구축하여 문제가 발생시 다시 원복 할 수 있게 데이터베이스 파일을 모두 /orabackup 디렉토리에 저장하였습니다.
[2010-12-14 05:37:59]-[oracle@estenpark:/orabackup]
$ ls -l
합계 2469212
drwx------ 2 root root 16384 12월 14 01:15 lost+found
-rw-r--r-- 1 oracle dba 2525982720 12월 14 01:36 ora_backup_201012120126.tar
[설명] 작업 내역은 아래와 같이 진행하도록 하겠습니다.
1. $ORACLE_BASE 디렉토리의 데이터베이스 파일을 모두 제거
2. 백업 파일을 $ORACLE_BASE 디렉토리로 이동하여 압축 해제
3. Oracle Database 구동
[작업 1] $ORACLE_BASE 디렉토리의 데이터베이스 파일을 모두 제거
[설명] 파일을 지우는 방식은 압축을 했을때 반대로 지우고 있는 것이므로 압축시 내역도 관리하는 것이 좋습니다.
[2010-12-14 05:41:56]-[oracle@estenpark:~]
$ rm -rf admin disks flash_recovery_area oraInventory oradata patchset product
[작업 2] 백업 파일을 $ORACLE_BASE 디렉토리로 이동하여 압축 해제
[설명] 백업했던 데이터를 $ORACEL_BASE 디렉토리로 이동 합니다.
[2010-12-14 05:38:00]-[oracle@estenpark:/orabackup]
$ mv ora_backup_201012120126.tar /home/oracle
[작업 3] Oracle Database 구동
[설명] sys 유저로 접속 해보겠습니다.
[2010-12-14 05:51:08]-[oracle@estenpark:~]
$ sqlplus / as sysdba
SQL*Plus: Release 10.2.0.4.0 - Production on Tue Dec 14 05:51:17 2010
Copyright (c) 1982, 2007, Oracle. All Rights Reserved.
Connected to an idle instance.
[설명] 원복을 위해 Oracle OPEN 단계로 수행합니다.
SQL> startup
ORACLE instance started.
Total System Global Area 285212672 bytes
Fixed Size 1267068 bytes
Variable Size 92277380 bytes
Database Buffers 188743680 bytes
Redo Buffers 2924544 bytes
Database mounted.
Database opened.
[설명] Oracle 정상 가동되면 "OPEN" 상태입니다.
SQL> select status from v$instance;
STATUS
------------
OPEN
[설명] Oracle Database 파일은 정상적으로 올라왔는지 각각 확인 해보도록 하겠습니다. control file 확인
SQL> select name from v$controlfile;
NAME
--------------------------------------------------------------------------------
/home/oracle/disks/disk1/control01.ctl
/home/oracle/disks/disk2/control02.ctl
/home/oracle/disks/disk3/control03.ctl
[설명] 일반 테이블스페이스, 시스템 테이블스페이스, 언두 테이블스페이스 등등 확인
SQL> col tablespace_name for a10
SQL> col file_name for a50
SQL> select tablespace_name, bytes/1024/1024 MB, file_name
2 from dba_data_files;
TABLESPACE MB FILE_NAME
---------- ---------- --------------------------------------------------
USERS 5 /home/oracle/oradata/testdb/users01.dbf
SYSAUX 270 /home/oracle/oradata/testdb/sysaux01.dbf
UNDOTBS1 30 /home/oracle/oradata/testdb/undotbs01.dbf
SYSTEM 490 /home/oracle/oradata/testdb/system01.dbf
EXAMPLE 100 /home/oracle/oradata/testdb/example01.dbf
[설명] TEMPORARY 테이블스페이스 확인
SQL> ed
Wrote file afiedt.buf
1 select tablespace_name, bytes/1024/1024 MB, file_name
2* from dba_temp_files
SQL> /
TABLESPACE MB FILE_NAME
---------- ---------- --------------------------------------------------
TEMP 20 /home/oracle/oradata/testdb/temp01.dbf
[설명] 상세한 버전을 확인 하고 싶다면 아래와 같이 수행하시길 바랍니다.
select * from v$version
지금 까지 Redhat Enterprise 4 OS에서 Oracle 10g R2버전 엔진 설치 및 패치를 설치 하였으며, dbac(자동 데이터베이스 생성), netca(오라클 넷-리스너 구성)을 진행 하였습니다.
'Data Architecture > DB Install' 카테고리의 다른 글
| [ Oracle ] Oracle Database Installation Guide 11g Release 2(11.2.0.2) for RHEL5(x86) (0) | 2010.12.17 |
|---|---|
| [ Oracle ] Patch Set, CPU, PSU 차이점 분석 (2) | 2010.12.16 |
| [ Oracle ] 수동 데이터베이스 생성 방법 (0) | 2010.12.14 |
| [ Oracle ] Oracle Database Installation Guide 9i (9.2) for RHEL3(x86) (0) | 2010.12.10 |
| [ Oracle ] Oracle Database Installation Guide 8i (817) for RHEL3(x86) (0) | 2010.12.08 |